Brrr… 10 Super Easy Ways to Save Money on Winter Heating Costs
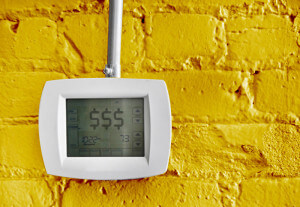
If I told you that you could spend a few hundred bucks now, and save $500 a year on your utility bills for the rest of your life, would you do it? I hope so. That’s exactly what this post will help you do.
If you haven’t noticed by now, I’m all about some efficiency.
But that’s not just limited to time management and productivity. I’m a bit of an efficiency enthusiast, the most recent development being a new house that my wife and I moved into over the summer.
It was great timing when we moved in, right at the end of the summer. That was nice. I didn’t have to raise a finger to keep the house cool for almost two months, and we’re just now getting to the point where we need to use the heat for more than a couple of hours per day.
But this isn’t my first rodeo. I know what’s coming as we enter the cold season if I don’t lock things down.
The previous owners were less than efficiency focused to say the least. Tripled or quadrupled utility bills and me walking around the house in half-treaded penguin slippers may have been in my future.
Fortunately, I know a little bit about energy efficiency, had a little help from my utility company who offered a $25 full energy audit, and was able to learn quite a bit more with the experiments below.
Energy Efficiency is Long Term
Before we get into the meat here, one very important thing to remember about any of the home improvements listed in this post is that these are mostly long-term payoffs. Aside from the cheap items like window film and draft guards (which are awesome), some of this stuff may take a couple of years to pay for itself.
While some of it will much sooner, the thing to remember is that by investing in weatherproofing your home, you can cut your energy bills significantly for the long term, and that’s a key element of developing a successful mindset and one I teach often on Academy Success.
Always think long term, and always be improving.
If you’re going to stay in your house for more than a couple of years, you’d be a fool not to make it more efficient by taking the steps below.
Otherwise you’re just flushing money.
So let the efficiency measures begin, ranked in order of what I’ve found to be the most effective so far – you can do the 80/20 for a few hundred bucks, or create a completely weatherproof fortress for under $1000, which can be a great long term payoff if you’re planning on staying in your home for more than a few years.
Some of these are improvements, while some are adjustments in behavior. All will save you money in the long run.
Wear Clothes

This one might seem like a no brainer, but I have seen multiple people with my own eyes complain about being cold while they’re wearing slightly more than what they might wear to the beach, maybe even the exact same thing.
If you’re serious about cutting your energy costs, don’t touch that thermostat until you’ve got at least a sweatshirt, flannel pants, and some thick socks on. And quit being afraid of blankets. They’re not just for sleeping.
The difference between keeping your thermostat on 66 degrees (don’t freak out – I’ll explain in the next point) and 74 degrees can be literally hundreds of dollars per month.
You’d be amazed at how warm a couple of layers can keep you, especially a nice base layer.
Caulk Around Your Windows (and Fireplace)

This one might seem pretty basic, but it makes a HUGE difference in the cold air that can get into your home.
Home builders do an OK job at caulking around the right and left side of windows, but often times completely skip the top and bottom. Sometimes they’re so rushed they shortcut this step completely.
This is an actual infrared image of a window in my house I had sent to me after an energy audit my utility company did for me. See the blue color in the photo? That’s 50 degree air pouring in the bottom of my window.
And that’s only because it was just 50 degrees outside. If it had been 30, that would have been 30 degree air… No wonder that room was freezing all the time.
This is one of the most cost effective upgrades you can do. A tube of caulk is about $3, and will do 3-5 windows, depending on how large the gaps you need to fill are.
Just go to your local home improvement store and get several water based clear tubes and go around every window in your house. This will cost you $50 at most, and will pay for itself in one season.
Also, if you have a fireplace, make sure you seal around this as well. Fireplaces are notorious for being extremely leaky around the outside edges, as well as the top and bottom. I went through a tube of caulk for my lower and main floor fireplaces each.
Get a Smart Thermostat
The newest tech on the market when it comes to efficient thermostats goes well beyond your basic weekend and weekday programmable thermostats. Technology like the Nest Learning Thermostat doesn’t stop at just letting you configure a schedule.
These smart thermostats actually help make that schedule for you based on your behavior patterns, so if you’re not home during one of your programmed “Home” days, products like Nest will sense it and you won’t waste energy. It will also recommend the most efficient setting based on outside temperature readings and energy usage in your area by giving you a simple to read green leaf on the LED display.
Additionally, it will squeeze out every efficiency possible from your furnace, sometimes running the fan just to circulate the warm air further, without running the heat. And best of all, it’s all tracked and gives you a custom report each month of your energy usage, which is great for experiments like the ones in this post.
To give you an idea of the impact it has made so far for me, our previous owners hovered around $275 a month on average from November through February, some even approaching $400. My November utility bill was less than half of that.
Sure, this is a pricey piece of tech, but with an iOS app for total control at all hours, plus all of the other efficiency settings built in, it will no doubt pay for itself in less than a year – likely far less.
Seal Exterior Doors and Windows (and Outlets)
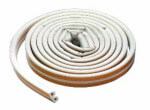
If you don’t have fancy new windows that are like 11 layers thick, then you’re probably getting a pretty good draft through your windows either through the glass itself, or through the gaps within the frame. You can usually tell just by placing your hand on or around your window on a cold day.
All outside facing outlets plates, including switches, are also exposed to outside air.
If it’s cold, that air is getting into your house.
There are a few things you can do here:
Draft Guards – These are great to seal out drafts from the bottom of windows as well as doors, and are re-usable from season to season. They’re easy to install by just snipping them to length and shutting the window down on them. They create a great seal. One tip I have with these is to cut them as close as possible to fit exactly in the opening. If you get sloppy and leave a gap, you risk air getting in. You can outfit your entire house for normally around $50 (look for these on sale at your local home warehouse store).
Weather Strip – A lot of windows have cheap foam weatherstrip, which can work OK, but normally it’s not very dense and breaks down easily. A simple way to keep out drafts from the edges of your window frame is with rubber weather strip. This will seal out drafts that get in gaps left by construction, as well as normal wood fluctuation. Put this sealant on all of your exterior entrances – doors, windows, and your garage if possible. Just make sure to clean the area well first or you may have trouble with it sticking.
Window Film – This is a step a lot of people skip, but for the price, is actually one of the most economical methods of weatherproofing that exists, especially if you have a lot of windows. Some folks report a 30% savings with these alone. These kits are made out of dense and completely clear plastic, so it’s very difficult to tell they’re actually on your windows, but they’ll act as an extremely solid barrier against drafts. You can seal your windows for about $1.50 each. These are installed by taping them around your windows with the tape included, then sealing them on with a hairdryer. It sounds a bit difficult, but it’s actually very easy. You can do your entire house in a couple of hours, and it’s well worth it. I personally noticed an immediate difference in how much warmer my house stayed after installing this film.
Outlet Insulation – All outside plugs, plate, and switch covers are exposed to outside air. You can pick up a couple of these variety packs for less than $10 each and seal every outlet in your home. These do a nice job of eliminating additional drafts that are caused by these small leaks.
Use Space Heaters Effectively
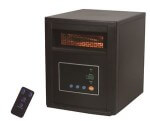
Many single folks, young couples, or families who are otherwise in situations where they may not use their entire house at all times, can benefit greatly from making efficient use of space heaters. Even larger families can use multiple space heaters to as supplementary heat sources.
Rather than heating the entire house at 72 degrees for example, a good strategy is to leave your thermostat on a level where it rarely has to kick on – usually in the mid 60s (hence the 66 from above) – and use space heaters to keep you comfortable in your main living areas where you spend the most of your time.
The key point to remember with space heaters is that they are most efficient when used as a supplementary heating source, not a primary heating source. They’re made to heat small areas that are already somewhat warm (around 62-66 F) from 6-10 degrees.
If you try to use them for anything more than that, they’ll actually be less efficient at the same temperature.
I recently snagged this Set of Two LifeSmart Quartz Infrared energy efficient space heaters.
They do a great job of keeping my wife and I warm in the evenings while we wind down, and comfortable while we sleep (when your thermostat should be the lowest). They’ve also got great energy efficient settings, a remote, and look great as well. Having two keeps us from having to lug them around.
But you can also grab just one.
—
Aside from blatant failures in insulation and construction, drafts caused by poorly sealed exterior doors and windows are the number one cause of a chilly house, and are very easy and cheap to fix.
Here are the few most common problem areas, and what to do to fix them.
Insulate and Seal Garage Doors

Garages are often un-insulated and attached to your house. Where it might be difficult to install wall insulation, it’s simple to install Garage Door Insulation. This will at least keep the garage much warmer, keeping the cold air that would normally get into your garage from getting into your house.
This stuff installs in minutes, and is super easy to use.
Couple this with a Garage Door Bottom Seal, and you’ll have a super locked down garage door that will be a nice barrier to cold weather. This can also make your garage much more usable year round as an added benefit.
We were lucky with the new place. It already had this insulation installed, and the garage rarely gets below 60.
Seal Interior Doors
You can also use the door draft guards mentioned above on the inside of your house to keep warm air from leaking out of rooms. I use this strategy with a couple of rooms I don’t use as much, as well as when I’m sleeping at night. This is an easy way to create heat zones, and allows you to efficiently close off vents in less frequently used rooms.
Aside from the big culprits, I’ve found many other strange areas you wouldn’t normally think would let in cold air… letting in cold air, and am working on sealing all of them in different ways.
Here are a few of the main offenders:
- Electrical outlets – Outlets are normally not insulated, and the exterior ones can let in a fair amount of cold air. Start with those and then seal off the interior ones as well. They can also let in cold air between non-insulated interior walls. You can insulate every outlet in your home for around $0.75 each.
- Cable or other media wire entry points – A lot of DIY’ers will not properly seal wires they run on their own. You can find these by following where your wires run and easily seal any small gaps with clear silicone for the cleanest look.
- Holes from duct work – Many homes have duct work that go through walls in drafty areas, such as garages. Make sure these are sealed. You can use expandable foam for this. Great Stuff is the go to product for this. A couple of cans of that will go a long way.
- Dryer vents – These are often completely unsealed. While they are necessary, make sure they’re directly attached to the dryer hose, and aren’t letting any air in otherwise.
- Fireplaces – Many fireplaces have vents that bring in air to supply oxygen to a fire, or to simply provide ventilation as needed. Great for fires. Awful for efficiency. It’s tough to seal these safely because if you want to start a fire, you’ll likely have to remove your weatherproofing. Suggestions welcome!
Close Doors, Inside and Out
This should go without saying, but I have seen people leave their doors open for extended periods of time in the winter while their furnace is cranking away.
Whether this is for a pet, because you like the fresh air, or whatever, this KILLS your efficiency. The second you open the door, cold air rushes in and pushes all of your hot air to the ceiling. That’s just physics.
Close doors whenever possible, and keep them closed.
But not just your outside doors. Keep your inside doors closed as well, especially if you’re not using the rooms they lead to. There is no reason to heat rooms you don’t use often, or tiny rooms such as bathrooms, laundry rooms, or closets.
This works inversely as well. If you’re in a room and have a space heater in there, why heat the rest of the house? Having your house set in the low 60s at night is fine if where you sleep is 70.
It’s easy to heat small rooms with a space heater, and it can save you a lot of money.
Make Use of Blinds, Curtains, and Drapes
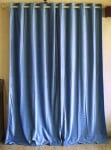
If you don’t want to go the full window film route I mentioned earlier, any window treatment can help cut down on drafts.
The best way to go is heavy curtains or drapes because there is a full cover for the window directing the cool air to the floor, but if that’s not your flavor, blinds can help as well, just not as much.
That said, having sun coming in during the day can help keep your home warmer (and happier :)), so don’t live in a dungeon or anything. Balance the sunlight with your need for efficiency.
Open Basement Vents (a little bit)
This is another experiment I’ve been doing since owning a home with a basement. At first, I was closing my basement vents all the way. I figured there was no need to heat the basement if I wasn’t going to be down there that often.
I was wrong.
What ended up happening was my floor was really cold, which really sucked to walk on. My upper floor is also open to the basement, so that cold air was coming right up the stairs.
Once I opened the vents downstairs about 1/3 of the way (a helpful suggestion from a friend), this helped phenomenally. My basement stayed tolerable, the heat from down below made it’s way upstairs more easily, and the furnace didn’t kick on nearly as much either. A nice win/win!
Did I Miss Anything?
Have you found anything that I haven’t listed here to be helpful in keeping your home warmer in the winter months? If so, share it in the comments or let me know via email so everyone can benefit.
Make sure to send this article to your friends as well. There is a lot of money to be saved with the tips above!



Excellent post. I was checking constantly this weblog and I am impressed!
Extremely useful information specifically the last section 🙂 I
deal with such info much. I was looking for this particular info for a
very lengthy time. Thank you and best of luck.